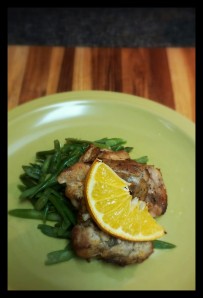
Bergamot Black Pepper Chicken with Orange

I am so excited about how good this recipe came out! I love when you try something totally new, and it comes out perfectly! I know you’re probably thinking “seriously… chicken thighs, again?” and yes, it’s true, we’re dark meat people. I use chicken thighs, bone-in and boneless, for most of my chicken recipes. I like that they are both less expensive and more flavorful than chicken breast – plus I think they’re on Brian’s top favorite foods list (yeah… for real).  Bergamot, a citrus fruit related to oranges, is what gives Earl Grey Tea its distinctive flavor. Usually, I am not a big fan of that flavor, however, when used in this marinade with tons of spicy black pepper and orange, it is a wonderful balance of flavors. I hope you give it a try!

0728141911a~2~2

Bergamot Black Pepper Chicken with Orange

2 lb. Boneless, skinless chicken thighs
4 tbls. Loose leaf Earl Grey Tea
2 1/2 c. Boiling water
2 tsp. Black pepper
Zest of 1 orange
Juice from 1/2 orange
Salt

In a large bowl combine tea, 1 tsp. black pepper and boiling water and steep, covered, for an hour, or until the water becomes cool. Strain, discard tea leaves, and return tea to bowl. Add remaining pepper, orange zest, juice, salt, and chicken and marinate for several hours or overnight.  Broil for 6-7 minutes or until they start to look golden and crispy on the outside, flip, top with slices from remaining half of orange, and broil for another 5-6 minutes.
These would probably be even better if you threw them on the grill!

0821141920a~2If there is one thing that can be said for the crazy storms we’ve had moving through in the past few days, it is that they create some stunning sunsets!
0821141912b~2~2

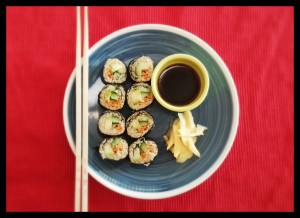
Long Run Fuel: Quinoa Veggie Rolls and Homemade Pickled Ginger

Until I started running I didn’t eat quinoa. It doesn’t fall into a strict Paleo diet, and I really had no use for the excess carbohydrates. Now that I am doing a lot more aerobic exercise, quite often for prolonged periods of time, the carb is sort of a “must-have” and as far as grains go, quinoa is a pretty good option: it’s gluten free, contains a broad spectrum of amino acids, and technically falls under the category of “pseudo-grains” or grain-like seeds.

I don’t think I’ve met anyone who wasn’t a fan of sushi. Even those who aren’t big on raw fish (I personally can take it or leave it) can enjoy all those wonderful sushi flavors in a veggie roll.  While going out for sushi can be an expensive venture, making it at home is cheap, easy, and really fun!!

Well cooked quinoa takes on a sticky consistency and therefore makes a fantastic replacement for sushi rice!
This recipe yields 2 rolls, so if you’re cooking with the family you’ll want to double or triple the amount of quinoa that you make. Nori, or roasted seaweed, sheets are easily found in most grocery stores in the ethnic food section.

Sticky Sushi Quinoa
1/3 c. Dry quinoa
1 c. Water
1 tbls. Rice vinegar

In a small or medium sauce pan, combine quinoa and water. Bring to a boil, then simmer on medium for 10-15 minutes, until the quinoa is mostly cooked and there is only a tiny bit of water left in the pan. Turn off the heat, add the vinegar, cover, and let sit for 5-10 minutes until all the water and vinegar is absorbed and the quinoa is very soft and sticky. Cool Slightly.

Time to get rolling!

Sushi Fillings
Finely sliced carrots, cucumber, and avocado are my favorites, but you could also experiment with bell pepper, lettuce, kale or zucchini. Try out different combinations and see which one you like best!

2014-08-16 13.19.26

Lay the nori on a clean, dry surface shiny side down. Spread a layer of quinoa evenly over the bottom 2/3 of the nori sheet. Using the quinoa while it is still warm helps soften the nori and makes it easier to roll. Spread your toppings in a line along the bottom of the sheet and begin to roll tightly, but gently, from the bottom up. When you get to the portion of nori where there is no quinoa, dip your fingers in some water and wet the top of the sheet – this is what makes it stick! Roll the rest up so that you have a neat “log”. Using a sharp knife, carefully cut into 1/2 inch slices.

2014-08-16 13.19.47

So, when I do go out for sushi, I’m that person that eats not only all of their own pickled ginger but the remainder of everyone else’s as well. I LOVE anything ginger. I just had to try making my own pickled ginger – with honey instead of sugar! It is definitely stronger than the stuff you’re used to being served at sushi restaurants, but if you’re anything like me, that’s a good thing!
It is really easy to make, and keeps for a very long time in the fridge!

Pickled Ginger with Honey

8 oz. Fresh ginger root, peeled and sliced paper thin.
1/4 c. Honey
1 c. Rice vinegar
1 tsp. Salt

Using a mandolin or vegetable peeler, slice the peeled ginger into paper-thin slices. In a bowl, combine ginger and salt and let sit for 30 minutes. Put into clean jar. In a small sauce pan, heat vinegar and honey over medium heat and bring to a boil.  Once boiling, pour vinegar over jar of ginger. Cool, cover, and refrigerate for several days. Taste-testing is the best way to know when it’s ready!

How We Do The Margarita: A Word From Brian

Today, A little guest post from Brian, who shares how to make his self-titled, “Wicked Pissah Marg”. These drinks are a delicious and not-too-sweet take on the traditional Margarita. They’re super fresh and perfect for summertime!

………

Okay, so you might not get totally hammered off one of these, depends on how you mix ‘em I suppose, but I have to pay homage to my home state with the name. For those unfamiliar with the term “Wicked Pissah”,  I’ve included a link to the appropriate definition: Urban Dictionary: Wicked Pissah

Tequila is probably my favorite adult beverage, definitely in the top 3 anyway. The only problem is that when you go to a bar or restaurant they have no idea how to serve tequila. Your either going to end up doing shots, which I’m okay with sometimes, or you have two options for mixed drinks. Usually if you ask them to make sometime “different” you get a tequila sunrise, definitely not my favorite. The other option is to get a margarita, always good right? Not! At least in my opinion. I really can’t stand sour mix, it’s so sugary and fake tasting, but above all else I LIKE to taste the tequila in my drink! Now keep in mind, I don’t consume much in the way of food or drink that has any sweetener. This means your preferences may be different. Anyway, what follows is my answer to the usual margarita. No sweetener, no sour mix, just natural ingredients and alcohol! Remember, drink responsibly!

0813141828a~2~2

Brian’s Wicked Pissah Marg
Serves 2

-4 oz. Tequila (Hornitos, Patron, Tres Agaves, etc.) Find one you like to drink straight up and you’ll be set!
-1 oz. Triple Sec (I’m poor, therefore I bought the cheapest I could find. It serves my purposes.)
-Limes (1 or 2 is usually good)
-Seltzer water (Lime or lemon/lime works well)
-Ice
-Salt (optional)
-Having a cocktail shaker really helps. You could probably just stir in a class if needed.

Directions:

Add ice to your cocktail shaker, this helps to keep your drink cold! After the ice is in, get your lime. I start by rolling out the lime with my hand, this helps soften it up so you can get more juice out of it. After it’s soft, cut it in half. If you stab the pulp side a few times with the knife you can get even more juice. Squeeze the juice over the ice, 1 lime will usually yield enough juice for 2 drinks. After I’ve juiced my lime I usually throw the squeezed wedges in the shaker for more flavor. Next is the fun part: Tequila! I’m going to leave the amount up to each person individually. As I’ve said before I like my margaritas to taste of tequila so I use more than I think I’m going to need.  Now that the tequila’s in, we can add the triple sec. Here’s your sweetener! – And more alcohol. If you want a little less tequila taste, and a sweeter drink, add more triple sec. Personally, I only add a splash, and I mean a very small splash.
Time to shake it out! Have some fun with it, maybe shake your booty while you’re mixing your drink. Or you can save this for AFTER the drink.
Okay, now that the drink is mixed, we need glasses! I use regular cocktail glasses but anything will work. Plastic cups are great if you’re going outside, pint glasses if you want a BIG margarita, or in my case cocktail glasses if you want to be a little fancier. So here’s the salt optional part; salt on the rim of your glass. It adds a nice contrast to the drink, but some people simply don’t like it. Either way is fine. If you are going to salt your glasses you should put a little salt on a plate, then wet the edge of the glass. It’s best if you use a wedge of lime and slide it around the edge of the glass, don’t lick them, people don’t appreciate that!
It’s good to have some ice in your glass to keep your drink cold while you drink it. Pour your drink mix into your glass, it probably won’t fill the entire glass – unless you’re going Wicked Pissah style. Once the drink mix is in the glass you can add the seltzer. I usually just fill the remainder of the glass with seltzer.
Once again you can tailor to your taste, less seltzer will be a stronger tasting drink. Other than offsetting the strength of the alcohol, the seltzer also adds nice effervescence!
The cherry on top is adding a wedge of lime to the edge of the glass, it looks good!

Time to enjoy!

-Brian

Long Run Fuel: Or Not…

It’s never easy when your long run is a failed attempt. I  had hoped to do 8.5 miles this morning after I rocked last week’s 8, but I just didn’t have it in me this morning. My immediate reaction is to start going through the list of variables in my head to figure out EXACTLY what went wrong: well,maybe it’s because I didn’t sleep enough, maybe it’s because I didn’t really eat any carbs yesterday, maybe I should have run yesterday, maybe I should have done yoga yesterday… the list goes on and on and on. And as I am trying to figure out precisely what I need to do to prevent this from ever happening again, that little voice of reason pops up in my head and says, “Maybe you should just let it go…” The hardest person to forgive and not judge is ourselves, and it is especially hard to accept ourselves during times of failure, but it is important to let it go and move on. Forgive, forget, and keep on trying! So I ran 6.6 with my Wednesday running partner, walked about a mile, then gave up as it started to thunder. Even though I was feeling a little down about my run, it was still a wonderful day off, and I’m going to tell you all about it!
Let me just start by talking about how disgusting the weather was this morning. 80 degrees and 78% humidity. Ugh! I know all you Maine peeps are like, “psh… stop whining! That’s nothing”, but even after only 3 months in the desert, that feels like the freaking rainforest. The air felt so thick and smelled like wet dust. Ugh!
So I was up at 4:30 because I really need like 45 minutes to get ready to go out for a run and to drink my coffee. Pre-run I like to keep it pretty simple. I don’t usually feel like eating anything this early  in the morning, but I find that I (usually) perform better if i do. Green apples seem to be about the easiest thing for me to digest before a work out, and before a long run I add just a little blob of honey to my coconut oil coffee (check out How We Do Coffee).  Then a few stretches, some leg swings, and air squats to get the blood moving.
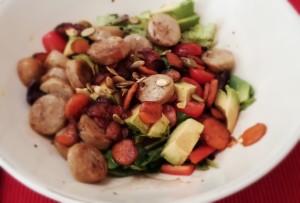
After my run, I came home, ate breakfast (eggs, quinoa, leftover parsnips! Yum!), drank a ton of water, and headed out for some shopping with Brian. Shopping went about as well as the run did… I have 3 events that I need dresses/outfits for and managed to find only one shirt that applied to none of the above. Shopping is way more exhausting than running – especially when you can’t find what you’re looking for. Brian had about as much luck as I did and called it quits as soon as hunger started to kick in. We came home for, you betcha, salads! Mine came out really pretty, just take a look:

2014-08-13 13.44.20

I wasn’t feeling the greens so much, so today it was mostly toppings. Cooked carrots, leftover sausage, avocado, bell pepper, cherry tomatoes, and oil and vinegar. SO good!!
We enjoyed a nice lazy afternoon hanging by the pool and relaxing at home. Batteries are re-charged and ready for what the rest of the week brings us! I’m thinking some running, eating, cooking, and nature!

0813141832~2


The Go-To Salad: All Dressed Up

I’ll admit it, my relationship with salad had its rocky beginnings.  In my youth, I hated vegetables and there was no way I was going near anything that leafy, and that green.  As a child I could not understand why would anyone eat an entire bowl full of what I just pulled out of my sandwich. But thankfully, as I got older, I began to look at vegetables with a bit more open mind. Salads started to look like maybe they were kind of cool, and that cool people ate them. I started slowly; gagging down a few greens smothered in creaming dressing and croutons on rare occasions.

Then came adolescence; high school and the years of dieting that followed. During this time, I was on a “diet” every single day of my life. Yo-yoing back and forth between dieting, failing, and putting myself down. I choked down countless lack luster bowls of greens because salads were “healthy”, “low-fat”, and “diet food”, or because I had binged on some other “not diet food” and felt that I only deserved to eat salad. These morphed into my “healthy vegetarian” days, when, again I ate daily bowls of greens for the sole reason that they were healthy, and that made me healthy. They were usually pretty bland, sprinkled with a few beans, some store-bought dressing, and accompanied a huge slab of bread.

But it wasn’t until a year after I’d gone Paleo that I really began to understand the art of making a really good salad, and once I did, I really started to love them!  These days it’s my go-to lunch and occasional dinner. I eat a big salad almost every day so we always keep everything we need on hand. Even if they weren’t so outrageously good for me, I’d eat them every day anyway! To me, they’re delicious, ever changing, fresh, and beautiful!


How to Construct the Perfect Go-To Salad
2014-08-12 07.58.31

 Greens: Greens are the foundation for your salad, they are what carry all those toppings and capture all those delicious flavors! For my everyday salad I like something flavorful, but not too strong tasting. Mixed baby greens are my go-to. They come pre-washed so you can use them right out of the box, and there’s no chopping involved. They aren’t as strong as kale, don’t leave that furry feeling on your teeth like spinach, and pack more flavor than romaine.

Veggie toppings: Now, some people will just throw on every single vegetable that they have in their refrigerator. Personally, I’m a bit more picky. I like my salads to be cohesive and pretty. I like everything to “go together”.  There are also certain vegetables that I feel just don’t belong on a salad: like celery. Love celery, hate it on salad. I’m funny about tomatoes too; cherry tomatoes are OK, but regular tomatoes get suspiciously watery looking if cut up and then refrigerated. I’m a weirdo, its fine. I like to pick by color – remember your salad can be as beautiful as it is delicious!

Protein: MEAT! Ok, it doesn’t have to be meat…. eggs are good too. I always keep a few cans of tuna in the cupboard for busy week days when left overs are scarce, or sometimes I’ll cook up a bunch of chicken to keep on hand for salad lunches on the go.

Extras: OK, here’s the fun stuff! This is where I like to add something that has a burst of flavor and adds a nice texture. Berries are great for a little bit of sweetness – dark cherries are my favorite!  Anchovies, bacon, and olives add a nice salty bite as well as healthy fat. Avocado is pretty much the best thing ever.  Roasted vegetables like carrots or peppers are a nice addition, and nuts and seeds add some crunch and texture – I always go for raw pumpkin seeds!

Dressing: If there is one sure-fire way to ruin a perfectly good salad it is with some poor quality, store-bought dressing.  Do you have to make your own salad dressing? No, but it is usually best if you do! Bottled dressings are usually made with poor quality, unhealthy, vegetable and soy oils and are also loaded with added sodium and sugar, as well as artificial flavors, colors, and preservatives.  You just made this beautiful, colorful, healthy salad – don’t smother it in crap! It’s a sin! 99% of the time I use olive oil and balsamic vinegar, it is delicious with every salad combo I’ve made to date, and I just never get sick of it!  Just remember that the purpose of salad dressing is to enhance the flavors of everything you’ve made your salad out of, not to over power it. Also remember that fat is a GOOD THING! Like, a really, really good thing! Your body uses fat to help absorb nutrients. Extra virgin olive oil is a great choice and is very economical, if you want to get fancy try some avocado oil or nut oils like walnut, almond, or pumpkin seed. Choose healthy fats that are rich in omega-3’s.

Last night we had salad for dinner, so I got a little fancy with the dressing! Roasted Garlic Salad Dressing was a delicious compliment to broiled steak and a big pile of fresh veggies! Here’s the recipe!

2014-08-12 07.56.48

Roasted Garlic Salad Dressing

1 Whole head of garlic, roasted
4 tbls. Olive oil, plus more for roasting
2 tbls. Red wine vinegar
1 tsp. Dijon mustard
Black pepper
Crushed red pepper, to taste
Splash of fresh lemon juice

Preheat oven to 375. Spread peeled garlic cloves into pan, coat with olive oil, and roast 15-20 minutes until golden and soft. Once cooled, combine garlic with remaining ingredients in food processor and pulse until smooth. Time for that salad to get dressed! Enjoy!

Green Mango and Tomatillo Salsa

I LOVE fresh salsa! It is one of my favorite things to make in the summer time. We love to eat it on top of grilled meat, fried eggs, and salads, or piled high on plantain or tortilla chips. “Tortilla chips are paleo?!”, you may ask. No. No, they’re not. Corn is a grain. But tortillas ARE delicious, and salty, and crunchy, and by far my favorite non-paleo treat. Tortilla chips and peanut butter – those are my biggest weaknesses by far, and I don’t let my self feel too guilty about enjoying one or the other every couple of weeks.  Today, I feel that I simultaneously worked off last night’s tortilla chips and earned tonight’s tortilla chips with my trail run this morning, so it’s all good.
This green mango salsa came out perfectly sweet, spicy, and fresh! It was also a great use for my *freezer pesto, that I almost always have on hand.  It’s a great way to use extra herbs – whether you’ve had a bumper crop in your garden, or picked up too much on sale at the grocery store. In this case, I used my jalapeno and cilantro pesto. To make, just blend cilantro, jalapeno, garlic, olive oil, and lime juice in a food processor until it is smooth. Then, pour into a zip lock bag, and smooth it out flat so that when it is frozen you are left with a “sheet” of pesto. You can break off what you need and keep the rest stored in the freezer.
Ideally, you would throw the tomatillos on the grill to get that nice charred skin. But here, it’s 106 degrees, and I just didn’t feel like hauling all my stuff down to one of the community’s grills, cleaning it, and standing outside to cook them. So, I took a short cut and sliced them, coated them in olive oil, and roasted them under the broiler until they were golden. If you are going to grill them, just remove their papery husk and pop them on the grill until they are softened and slightly blackened.
Green mango has a slightly tart flavor, and a really nice firm texture. It is not as overpoweringly sweet as the ripened version, which is what I think makes it perfect in salsa. It is also a little easier to work with when it is not soft and spilling juice all over the place. Just choose a mango that firm but not too hard, and only just starting to turn red/yellow at the top.
This salsa is delicious over grilled chicken and served along with one of Brian’s “Wicked Pissah Margs” – Stay tuned for this great, (almost) guilt-free version of a traditional margarita!
2014-08-10 17.32.06
Green Mango and Tomatillo Salsa

4 Tomatillos, grilled, or sliced and broiled
1 Green (under ripe) mango
1 Bell pepper, diced
1 Jalapeno pepper, finely diced
3 Scallions, sliced
1 Lime, juice and zest
1 tbls. Cilantro Jalapeno freezer pesto*, or chopped fresh cilantro
Black Pepper

Peal husk from tomatillos and slice into thick slices, coat with olive oil, and broil in glass baking dish until charred, or grill whole tomatillos until charred and softened. Cool, chop, and toss into large mixing bowl. Peal mango with vegetable peeler, slice off from pit, and dice. Add to bowl  along with bell pepper, jalapeno, scallion, lime zest and juice, and cilantro pesto. Sprinkle with black pepper, mix and serve!

Long Run Fuel: Sweet Potato Skillet Chicken

This morning’s weather cooperated beautifully for my long run today! It was a cool 80 degrees when I met my running buddy at 5:30 this morning. Cooler temperatures and someone to chat with during the long slog makes such a difference in my running capabilities! She and I ran together for the first 6.6 miles until she had to go home to get the kids ready for school, then I carried on until I met my goal for this week. Today that was a to do a solid 8 miles, without stopping to walk.  Goal achieved! And now I can spend the rest of my day just relaxing!
As I do more and more running, I find it challenging to balance my carbohydrate consumption.  The Paleo diet in nature is relatively low carb, and I find myself really having to remember to eat more starchy food when I’m active. When I don’t, adrenal fatigue sneaks up on me, usually the day after my long run or more intense workouts. Sweet potatoes, winter squash, plantains, quinoa, and green apples are my favorite carbohydrate sources. I try to keep my diet pretty low in sugar and only occasionally reach for other fruit, a handful of raisins, or a teaspoon of honey. I also find that if a eat a carb-dense dinner the night before a substantial run, I don’t have to eat much, or anything, to feel energized through my workout in the morning.
Last night Brian and I celebrated an ordinary Wednesday with a couple of happy hour glasses of wine. It seems like almost every restaurant in Scottsdale has extensive happy hour specials – it’s a great way to check out all the local hangouts! What is not so great about happy hour, is that it tends to happen on an empty stomach, which for me meant that dinner needed to be EASY! I whipped up this Spicy Chipotle Sweet Potato Chicken Skillet in no time, and it was both a delicious dinner and the perfect fuel to go the distance this morning!


2014-08-06 20.46.16


Spicy Chipotle Sweet Potato Chicken Skillet

2-3 Lg. Sweet potatoes, chopped into 1/2 inch cubes
2 lb. Boneless, skinless chicken thighs
1 7 0z. can, Chipotle peppers in adobo sauce (*be sure to read your ingredients first!)
2 tbls. Olive Oil, plus more for coating the pan
1/2 Lime, juice and zest
1 tbls. Maple syrup
1 tbls. Water
1 tsp. Smoked paprika
1 tsp. Chili powder

Preheat oven to 375.
In a food processor, combine chipotle peppers, olive oil, lime zest, lime juice, maple syrup, and water and blend until you have a smooth sauce.
Coat a large cast iron skillet with olive oil.  Add cubed sweet potato and sprinkle with smoked paprika and chili powder. Layer chicken thighs on top of sweet potato. Rub half of sauce over chicken, flip, and rub top with remaining sauce.
Bake for 45 minutes to an hour, until chicken is cooked and sweet potatoes are tender.

Smoky, spicy, easy and delicious!

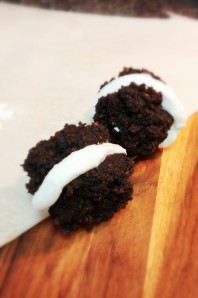
Mini Plantain Whoopies

That’s right. I just Paleo-fied the Whoopie pie. I’m sure there are many Mainers out there that probably see this as a horrible act of sin. I’m sure some of your relatives just rolled over in their grave. I, however, was recently informed that I would never be a true Mainer because I was technically born just over the New Hampshire border – So I have no qualms with reworking this wonderfully delicious Maine tradition. Hey, I’m “from away”. It is absolutely true that if you compared these side by side to your Grandmother’s Whoopie pies, they wouldn’t stand a chance. Not even a little one. But as a Paleo alternative to the real deal, they are WICKED good!!

0805141442~2
Mini Plantain Whoopie Pies
2 Plantains, pealed and sliced length-wise
1/4 c. Coconut oil
3 tbls. Maple syrup
1 tsp. vanilla
3 Eggs
3 tbls. Coconut flour
3 tbls. Cocoa powder
1/2 tsp. Cinnamon
1 tsp. Baking powder
Pinch of salt

Filling
1 Can full fat coconut cream, separated * (use only the concentrated part from the top of the can, not the liquid in the bottom)
1/2 tsp. Vanilla
1 tsp. Maple syrup

Heat oven to 375. Peal Plantains by cutting each end off, scoring the peal length wise and pealing off. Cut plantains length wise and place in glass baking dish. Cover with foil and bake 15 minutes until they are soft. Reduce oven temperature to 350.
In a food processor, blend plantains until smooth. Add coconut oil, maple syrup, and vanilla and process to mix. Pour mixture into large mixing bowl and stir in eggs. Mix in dry ingredients. It should be a thick batter. Spoon onto parchment lined cookie sheet and bake at 350 for 20-25 minutes until firm. Cool completely.

Scoop the top half of coconut cream out of the can and into a bowl or blender. You want to use the concentrated, thick, cream. Whip or blend in maple syrup and vanilla. Chill.

The soft plantain cookies are just perfect as a stand alone, but spread a layer of cream between them and now you’re Makin’ Whoopie! Enjoy!

*You really need a can of coconut cream that is separated, so that the fatty part is all at the top of the can when you open it. You can sort of tell by shaking the can – if it sounds like liquid is moving around in there, than it is not separated. Yes this means that you might look like an idiot standing in the aisle at the grocery store shaking all the cans of coconut cream. But trust me – it’s all worth it.  You can also store your can of hopefully separated coconut cream in the refrigerator to help it along. If your filling comes out a little more like whipped cream than frosting, that OK. They’re equally delicious, and just a little messier to eat!

0805141447~2

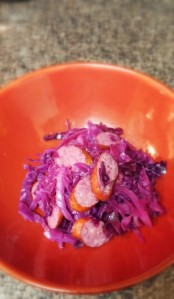
Red Cabbage with Keilbasa

This is so easy, I feel guilty even posting it as a recipe. Cabbage and sausage is one of our go-to, I-cant-think-of-anything-to-make, cheap, quick meals. And, as with most things I make, you can slap a fried egg on top of the warmed left overs in the morning and call it breakfast. These days it is pretty easy to find sausage in most super markets that has very few ingredients and is antibiotic, nitrate, and casein free. Always be sure to double check your ingredients! What companies advertise on the front of their packaging is not always the full story. They’re so sneaky! One thing I am very careful with, besides any ingredients that end in “-ate” and “-ite”, is “lactic acid starter” which shows up in cured and smoked meats even “dairy-free” cheese products (umm…. ew!). While lactic acid is very safe for those with dairy allergies and doesn’t contain dairy, lactic acid starter is a bacterial starter culture used for fermentation, and it is started, and grown, in milk. If you are sensitive to dairy, and that pops up in the ingredients list, be sure to make sure it also says “not from dairy”. It can be problematic for those who cannot tolerate lactose, casein and whey.

Red cabbage is a great veggie! I pick one up at the grocery store almost every week, and if I don’t use it right away, it lasts a very long time in the fridge. It’s flavor is much more mild than that of green cabbage, which makes it perfect for sautes, stir fries, or slaw. It is inexpensive, yields a lot, and you can’t beat the vibrant purple color! I love when food is pretty!

2014-08-03 20.50.17

Red Cabbage with Keilbasa

1 Small-medium sized red cabbage (or half of a large one)
1 Granny Smith apple, pealed and diced
1 Shallot, diced
1 12 oz. Package nitrate free Keilbasa, sliced
1 tbls. Red wine vinegar
2 tbls. Fat/oil of your choosing (bacon, butter, coconut oil – what ever you typically use over medium-high heat)
Salt and Pepper

In a large pot, or very large skillet, heat oil and add diced apples and onions. Saute until caramelized and golden. Add cabbage, salt and pepper.  Saute for a few minutes before adding sliced keilbasa. Cover and cook for 15 minutes, until larger pieces of cabbage are tender. Stir every few minutes. Add 1 tbls. red wine vinegar, stir, and serve!

Cranberry Bison Bites

“Well, you’ll either come out of this alive, dead, or sterile”.  I’m not kidding, I actually heard this said from one cowboy to another Friday night. We ventured north to checkout a place called Buffalo Chip Saloon in Cave Creek, AZ to check out some live bull rides, music, and country swing dancing.   Think bar meets rodeo. Apparently, you can even ride your horse there, I found Mae Bell hitched up in the corner. You  just never know what you’re going to find when you move to a part of the country that is so drastically different from where you came from.

0801142106


The south west is a non stop adventure. 

0801142050

And for the perfect cowboy (or caveman) snack, Cranberry Bison Bites! These bite sized meat balls are flavored with spices, cranberries, and just a hint of molasses. Perfect after hitting the trail, whether on a horse or on your feet!

2014-07-31 20.33.39

Cranberry Bison Bites

1 lb. Ground Bison
1 lb. Ground Grass Fed Beef
1/2 c. Dried Cranberries
2 tbls. Blackstrap Molasses
2 tsp. Sage
2 tsp. Fennel Seeds
2 tsp. Rosemary
2 tsp. Thyme
1 tsp. Onion Powder
1/2 tsp. Celery Seed
1/2 tsp. Garlic Powder
Salt and Pepper

Combine all in a large bowl and work with your hands until everything is well incorporated. Roll into bite sized meat balls and spread on sheet pan. Broil about 15 minutes until they are browned on the top. How easy is that?! Enjoy!

0801142107a